
To deploy Tracker.Net using Windows Authentication, check the "Use Integrated Windows Authentication" box on the Other Settings tab of the Global Settings screen as shown below.
In Internet Information Services (IIS), both Forms Authentication AND Windows Authentication need to be enabled. You can set this via "Authentication" settings for the Tracker application.
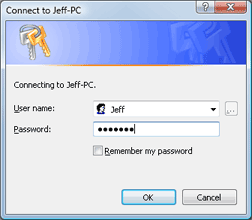
If users have not already been authenticated, they will be prompted with a dialog box like the one show below:
After authentication, they will be redirected to the Options screen if they have already been successfully added to the Tracker.Net database as explained in User Requirements below.
In order to use Windows Authentication, users need to be preloaded into Tracker.Net using either the Student Import Utility or directly into the Tracker_Students table in the database.
The User Name needs to be set to the name of the user (for example User.Identity.Name). Depending on whether Include Domain for Windows Authentication on the Other Settings tab of the Global Settings screen is set to true, this will either be the domain name/user as in Jeff-8/Jeff or just the user as in Jeff. This setting is shown below.

The password is not used and can be any value (but not blank).
It is important to set the ExitURL on the Global Settings screen to be a value outside of Tracker.Net since otherwise users exiting the system will be in an endless loop of being redirected to the Options screen. Custom Messages are not supported under Windows Authentication although Custom Organizations are supported. Other values such as the ability to email user names and passwords or use security questions are not applicable to Windows Authentication as well.